Task Registration Documentation
“Task Registration – WordPress plugin” Documentation by “Atypisch (Marten Timan)” v2.4
“Task Registration”
Created: 27/03/2017
By: Marten Timan, Atypisch webdesign & webdevelopment
Email: marten@atypisch.nl
Thank you for purchasing my plugin. If you have any questions or suggestions that are beyond the scope of this help file, please feel free to email via my user page contact form here. Thanks so much!
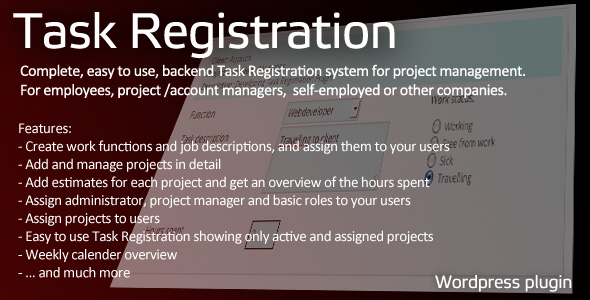
Features:
- Create work functions and job descriptions, and assign them to your users
- Add and manage projects in detail
- Add estimates for each project and get an overview of the hours spent
- Assign administrator, project manager and basic roles to your users
- Assign projects to users
- Easy to use Task Registration showing only active and assigned projects
- Weekly calender overview
- … and much more
–
Table of Contents
- Installation instructions
- Using the plugin
- Different User Levels
- Options
- PHP File functions and Structure
- JavaScript
- About this Plugin
A) Installation instructions – top
Just copy this plugin (the entire ’task-registration’ folder) into your WordPress plugins directory. Then go
to your plugin section in the WordPress CMS and click ‘Activate’.
B) Using the plugin – top
Once installed, in WordPress you will see a new tabs called ‘Task Registration’.
As an administrator you have the ability to add/manage projects, functions, tasks, users and more. You can define the content show per User Level, more of which is explained below.
The Tabs in order are Status, Task overview, Add tasks, Active projects, Manage projects and Functions.

Status
Visible by Administrator and Project Managers only. This shows a quick status overview of your users. The first table shows an overview of the last completely filled in Working Day per user.
In ‘Tasks by date and user’ you can select a date and User, and check (and edit/delete) all tasks of all users.
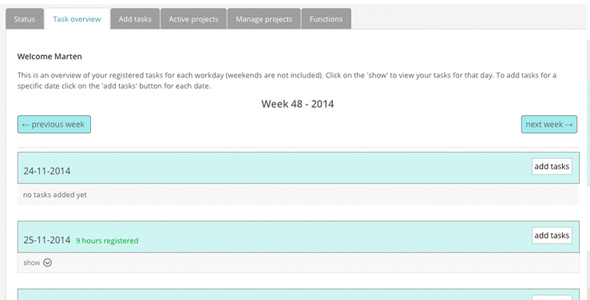
Task Overview
Visible by all users. This shows a calendar-like overview per week with all your tasks per day. You can show/hide these tasks and edit or delete them.
If your amount of registered tasks is equal to or exceeds the amount of working hours per day it will show in green. If the amount is less it will show up in red. ” no tasks added yet ” will show is you have not yet added tasks for that date.
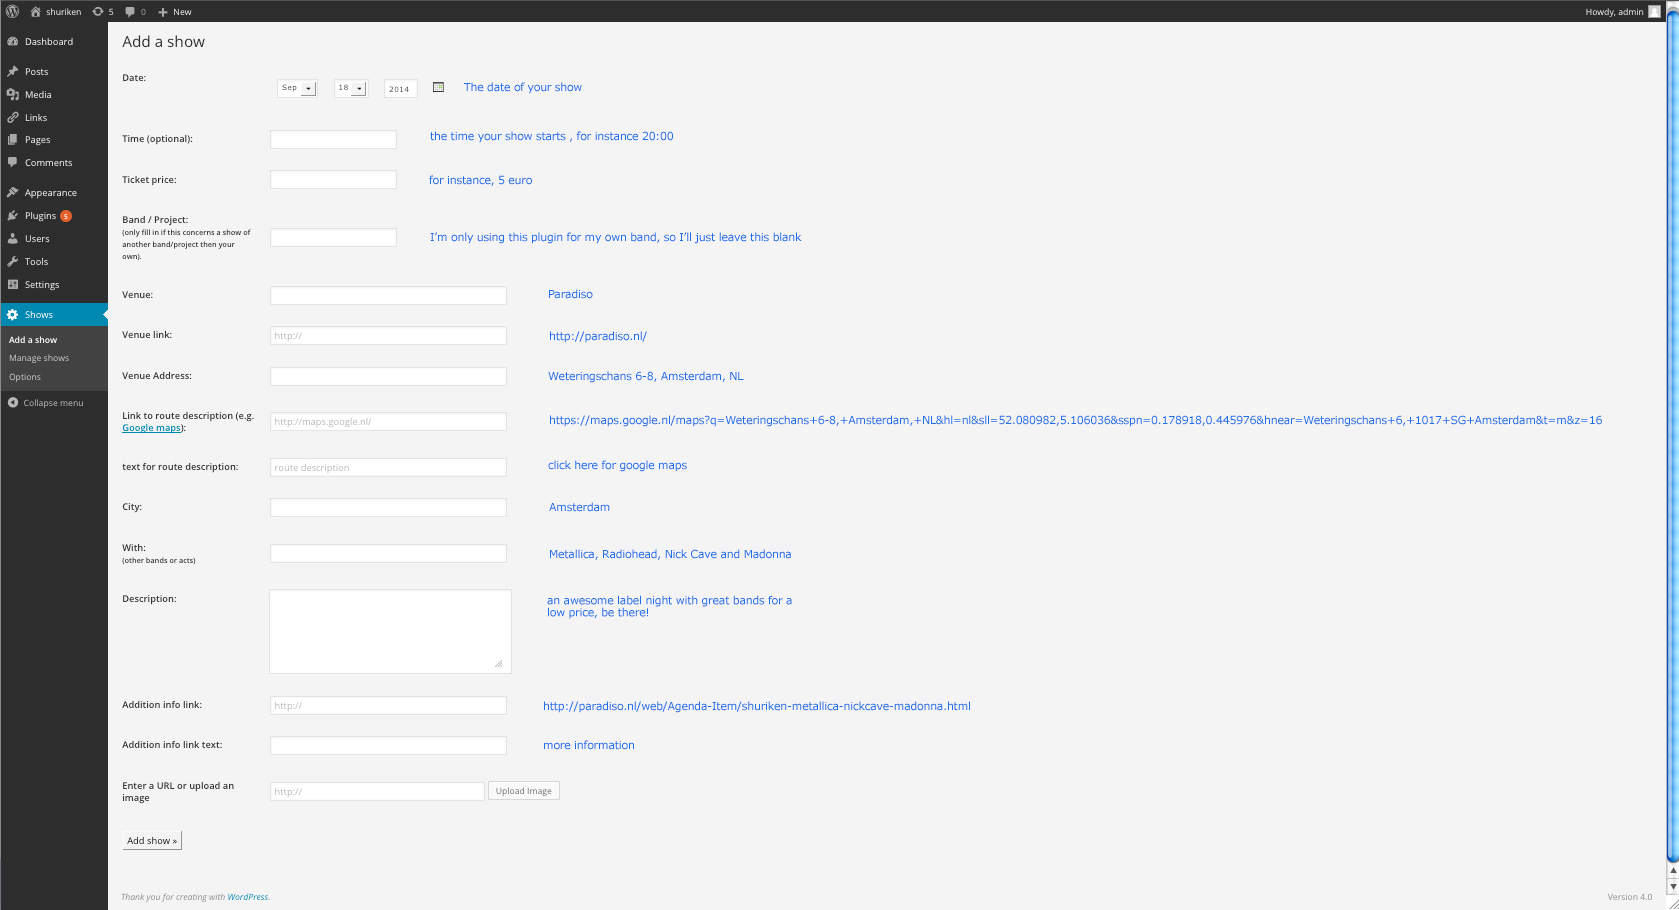
Add Tasks
Visible by all users. Basically this is the main functionality of this plugin. Task registration fields are visible per project. You can only see these fields if you are assigned to a project by a project manager.
Per field it shows the client, project nr or subject and description in the header. Below you can select only the Functions that are assigned to you as a user. In Task description you can write a small description about your activities.
The date is automatically set to the current day, or the day you selected in the Task overview Add or Edit button, or the last day that is not registered completely.
In your Work status you can select Working (default), Free from work, Sick or Travelling as four main options. In the bottom you will have to fill in the amount of hours spent.
You can add your hours up to 2 decimals. Use points, not kommas (so 2.25 or 5.85 is fine for instance).
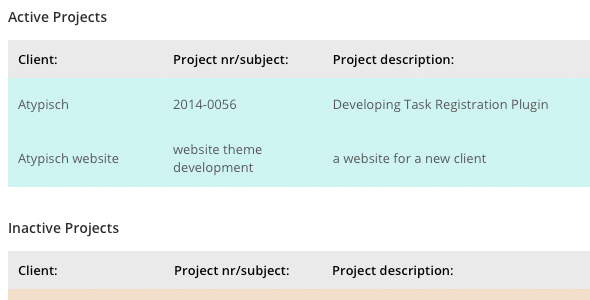
Active Projects
Visible by Advanced Users and above. Active Projects gives a quick overview of all current Active projects and the hours spent per function on that project. There is also an option to print the current project overview.
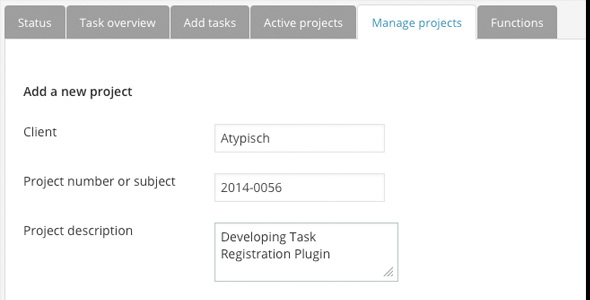
Manage Projects
Visible by Project Managers and above. Here you can add a new project, fill in a Client name, project number or subject, description, enddate of the project and an estimate of the
total amount of hours for this project per Work Function. This estimate will be the base of the project, and the amont of hours spent will be calculated with this estimate.
Furthermore, you can (and will have to) decide whether the project is active, and which people are assigned to this project. People can only register their tasks if they are assigned to a project.
In the overview below you can edit or delete the active and inactive projects (which are separated by row and color), and you can have a quick overview per project (slightly different then the former project overview).
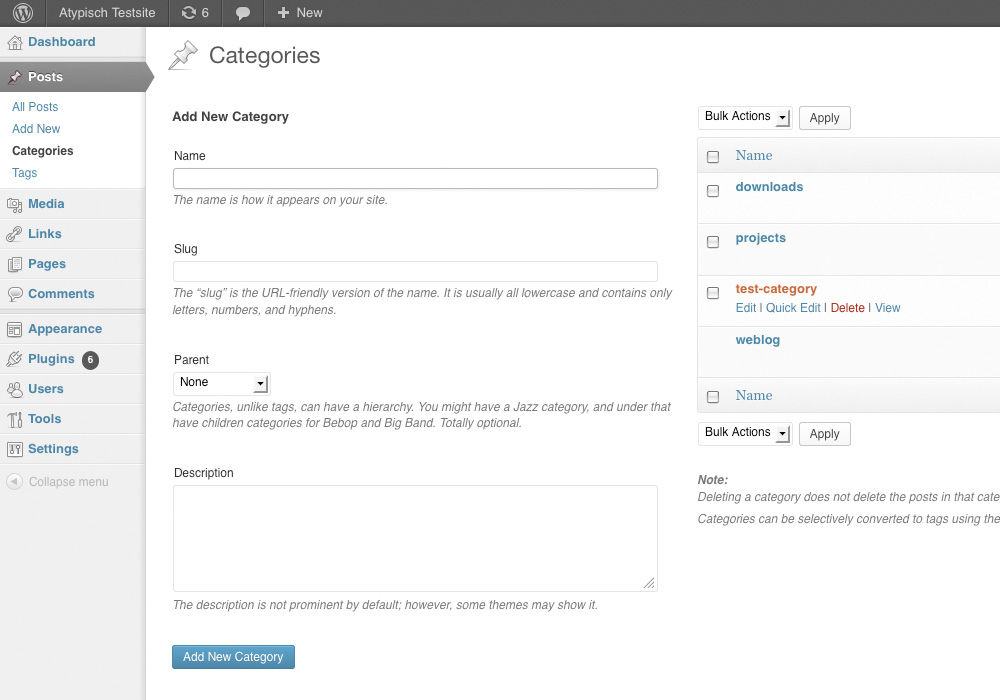
Adding a Function
Working Functions are necessary to make an estimate for your projects and to assign to your users. For instance, a Graphic Designer, an Account Manager, a Webdeveloper or a Creative Director are all Working Functions.
Add a Working Function title, short description and order here. This order will be used in your estimate and overviews as well. Furthermore you can check the function as Active/Inactive (check for active) and assign the function to one or multiple users by checkbox.
C) Different User Levels – top
This plugin uses the WordPress User system as a base for adding tasks based on different User Levels. Every employee, co-worker or collegue involved must have a WordPress Username and Password and has to log in to the CMS to use this plugin.
There are different Roles you can choose within WordPress, read more about the different User Roles here and
about adding users here.
In Task Registration > Options you can change the User Levels for the 3 types of accounts within the plugin. These Users will then only see certain Tabs based on their Account (Basic, Advanced or Project Manager).
So make sure before you add Projects or Functions that you have added WordPress Users first.
D) Options – top
There are several options for this plugin:
- Minimum User Level for Basic Account. – The Basic Account level is the most common level and will be used for all users just adding and editing their own tasks. Visible: Task Overview, Add Tasks.
- Minimum User Level for Advanced Account: – The Advanced Account level also adds the opportunity to view all current projects and details of the registered tasks for those projects. Visible: Task Overview, Add Tasks, Active Projects.
- Minimum User Level for Project Management: – The Project Management level shows all options and editing capabilities. Visible: Task Overview, Add Tasks, Active Projects, Manage Projects, Functions and Status.
- How many hours are there in your normal working day? (default is 8) – This number will be used to calculate the minimum amount of hours that all users must register for each working day.
Uninstall
- On ‘Uninstall Plugin‘ you can uninstall the entire plugin, which will also result in deleting the entire database table for this plugin and all of its settings.
So please be careful to backup all your data from your database before you uninstall this plugin if you want to keep this.
G) PHP File functions and Structure – top
Functions
The plugin consists of several PHP files. The main file functions.php contains all the necessary PHP functions and includes for this plugin. These are the functions briefly explained;
name: qInsertFunction
purpose: Insert new Work-function in the database

name: qGetAllFunctions
purpose: get all Work-functions from the database

name: qGetAllActiveFunctions
purpose: get all active Work-functions from the database

name: qGetAllFunctionNicenames
purpose: get all function nicenames from the database

name: qRemoveFunction
purpose: remove function from the database

name: qGetFunctionByID
purpose: get function by ID from the database

name: qUpdateFunctionByID
purpose: update function by ID from the database

name: qInsertTasks
purpose: insert new Task in the database

name: qGetAllActiveTasks
purpose: get all active Tasks from the database

name: qRemoveTasks
purpose: remove Task from the database

name: qDeleteTasksByProjectID
purpose: remove Task from the database by Project ID

name: qGetTasksByID
purpose: get Task from the database by ID

name: qUpdateTasksByID
purpose: update Task from the database by ID

name: qGetAllDatesFromTasks
purpose: get all the dates from the Tasks in the database

name: qGetActiveTasksByYear
purpose: get all the active Tasks in the database by year

name: qGetActiveTasksByProject
purpose: get all the active Tasks in the database by project

name: qGetCompletedTasksByProject
purpose: get all the completed Tasks in the database by project

name: qGetTasksByUser
purpose: get all the Tasks in the database by User ID

name: qGetTasksByUserByDate
purpose: get all the Tasks in the database by User ID and Date

name: qGetTasksByUserByYear
purpose: get all the Tasks in the database by User ID and Year

name: qGetTasksFromFunction
purpose: get all the Tasks in the database by Function ID

name: qGetTasksFromProjects
purpose: get all the Tasks in the database by Project ID

name: qGetSpentHoursByProjectAndFunctionID
purpose: get all the Hours spent on Tasks in the database by Project AND Function ID

name: qCountTaskHoursByUser
purpose: get all the Hours spent on Tasks in the database by User ID compare with Amount of daily working hours in Settings

name: qInsertProjects
purpose: insert a new project

name: qGetAllProjects
purpose: get all project by project name

name: qGetAllActiveProjects
purpose: get all active projects by project name

name: qRemoveProjects
purpose: remove project by project ID

name: qGetProjectsByID
purpose: get project by project ID

name: qGetActiveProjectByID
purpose: get active projects by project ID

name: qUpdateProjectsByID
purpose: update project by project ID

name: qInsertProjectUsers
purpose: insert project users by project ID

name: qGetProjectUsers
purpose: get project users by project ID

name: qDeleteProjectUsers
purpose: delete project users by project ID

name: qGetAllActiveUserProjects
purpose: get all active project users by project user ID

name: qInsertFunctionUsers
purpose: insert Function Users in the database

name: qGetFunctionUsers
purpose: get Function Users from the database

name: qDeleteFunctionUsers
purpose: delete Function Users from the database

name: qGetAllActiveUserFunctions
purpose: get all active Function Users from the database

name: qGetHoursByID
purpose: get Hours by ID from the database

name: qCheckHoursByID
purpose: check if hour_id exists, if not create, if so update

name: qInsertHours
purpose: insert new hours in the database

name: qGetHoursByProjectID
purpose: get hours from the database by Project ID

name: qGetHoursByProjectAndFunctionID
purpose: get hours from the database by Project ID AND Function ID

name: qUpdateHoursByID
purpose: update hours from the database by Hour ID

name: qRemoveHoursByID
purpose: remove hours from the database by Hour ID

name: qRemoveHoursByProjectID
purpose: remove hours from the database by Project ID

name: qRemoveHoursByFunctionID
purpose: remove hours from the database by Function ID

name: qGetAllDates
purpose: get all the dates from the database

name: tr_options_page();
purpose: Admin options page

name: tr_check_config();
purpose: Create or update the options

name: tr_options_submit();
purpose: Save options

name: check_mysql_table_exists();
purpose: Check if the table exists in the database

name: CreateTables
purpose: Create the necessary mySQL Tables

name: tr_plugin_uninstall();
purpose: Delete the entire database table and remove the options on uninstall.

name: listAllUsers
purpose: List all WordPress users

name: is_weekend
purpose: check if the date is a weekend or not

name: yearArray
purpose: make an array of the year

name: check_yearly_working_dates
purpose: check all yearly working dates

name: write_workday_to_db
purpose: write the working day into the database

name: qGetWorkDays
purpose: get the work days from the database

name: x_week_range2
purpose: return the range of the days

name: previous_week
purpose: get the previous week

name: next_week
purpose: get the next week

name: GetDays
purpose: get all the days from the database

name: convert_date
purpose: convert the date to another format

name: week_of_month
purpose: find out and return week number
Structure
This is the basic structure of the plugin and the containing files, starting from the plugin folder ‘shows-archive’.
- tr-index.php (main plugin file)
- create_functions.php
- edit_functions.php
- create_tasks.php
- edit_tasks.php
- create_projects.php
- edit_projects.php
- footer.php
- functions.php
- project_overview.php
- status_overview.php
- task_overview.php
- view_people.php
- view_project.php
- images (folder)
- show.png
- show-over.png
- showhide.png
- hide.png
- hide-over.png
- calendar.jpg (small calendar icon)
- ok.png
- next.gif (next icon for calendar)
- prev.gif (previous icon for calendar)
- css (folder)
- style.css (main css file)
- form.css (css for forms)
- print.css (css for print)
- tabs.css
- js (folder)
- calendarDateInput.js
- functions.js
- documentation (folder)
- assets (folder)
- …blueprint css files and images for this explanation file
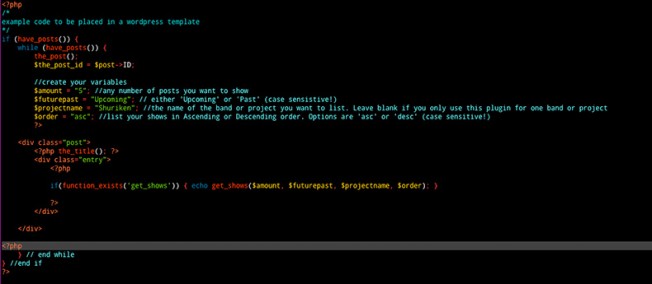
- code-example.php (a small PHP code example)
- index.html (this file)
- screenshots (folder)
- … (screenshots 1 to 12)
- assets (folder)
Please do not edit or extend these functions.
H) JavaScript – top
This theme imports and uses several Javascript files. These are stored in the ‘js’ folder.
- The WordPress jQuery library is being enqueued.
- calendarDateInput.js is used for adding a DatePicker to the forms when adding or editing a show.
- functions.js contains a few custom function for the Tabs, show/hide options and for printing a page in a new window.
- jQuery is a Javascript library that greatly reduces the amount of code that you must write.
I) About this Plugin – top
type: WordPress Plugin
languages: PHP, HTML, CSS, MySQL and jQuery javascript
version nr: 2.4
release date: 27/03/2017
This plugin is compatible with all newer versions of WordPress, tested up to WordPress version 4.7.3
Plugin documentation URL: http://www.atypisch.nl/plugins/task-registration/
This plugin is entirely written by Marten Timan, owner and founder of Atypisch Webdesign & Webdevelopment currently based in Utrecht, The Netherlands.
Please feel free to make a donation to stimulate further development of this or other plugins.
Once again, thank you so much for purchasing this plugin. As I said at the beginning, I’d be glad to help you if you have any questions relating to this theme.
No guarantees, but I’ll do my best to assist.
If you have a more general question relating to the plugins on CodeCanyon, you might consider visiting the forums and asking your question in the “Item Discussion” section.
Marten Timan
Atypisch webdesign & webdevelopment